 |
|||||||||||||||||
|
|
|||||||||||||||||
|
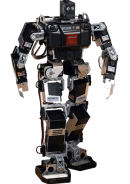
Now that weíve set the Trim position, we can go ahead and set the home position. ďWhatís the point?Ē I hear you ask? Well the Trim position is all well and good, however itís not a very natural position. Letís be honest, we didnít build a biped robot to have him look stiff and robot like, well at least not all the time! If the goal is to try to get some natural looking movement then we should start with a natural looking pose. While the trim position will allow you to use downloaded movements, and swap out servos easily itís only really a reference position, the Home position is the start for all the work weíll do from now on. I chose to start with the arms slightly bent, and the knees slightly bent, to lower the robot slightly, and take away a little of the stiffness from the Trim position. I may end up changing this again but for now itís a bit better. To do this, go back to the POS window, and move the sliders for the servos you want to change until youíre happy. When you are, right click in the editing window and select ĎSet as Home Positioní. Youíre done. All too easy. You can now move between the Trim position and the Home position by clicking the icons on the top of the H2H window. |
|
So far, this is all very exciting, and if youíre anything like I was, being able to toggle between these two positions was fun, and I had a huge grin on my face. But, itís still not really given us anything useful. When we turn the robot on, it still doesnít know what to do, and will go back to the free position where the servos are not powered. We need to change that. It would be good if when we turn the 1HV on, it would go to our newly set home position. And thatís exactly what weíre going to do next. Power cycle the robot then go back to H2H. Select the sync checkbox, and remove any objects in the worksheet. (If you still have the POS there from earlier, right click it and select delete). Weíre now going to load our first pre-defined motion. On the CD that came with the kit, youíll find some Sample Motions. I have the Japanese CD (If I find English versions Iíll update the location - or if anyone knows where they are then please let me know!) so the names are a little harder to match, but go with the start of the file as they are all numbered differently. Select the folder icon in the top left to open a motion, and select Ď1HV000_Startup.rcbí. This will load the motion which frees the servos, then moved the robot to the home position as itís first action when turned on. To use our own Home position, double click on the blue Home Pos object in the worksheet to open the POS window. In the bottom left of the window, youíll see the Home icon (the house). Click this and our home position settings will be set into the POS sliders for us. At this point, youíre probably wondering why we have a step in the motion to free the servos. The reason is quite simple. Since we donít know where the servos will be positioned when we turn the robot on, if we go straight to the home position, we could damage the servos. The next step is to read the current servo positions from the servos themselves so we know where to start the motion to get to the Home positions. Finally we move the robot to the Home position. Before we can set the motion to be executed on startup, we need to upload it to the RBCís memory. We do this by clicking the write icon, then selecting a location in the memory to store the motion. I selected M80 (the last slot) but you can select any slot you want. Click ok and the motion will be written. The OK message will be displayed under the icon bar if successful. |
|
To get the motion to play on startup, select the Option dialogue, and you will see a drop down labeled to play a motion when power is turned on. Select the slot we just uploaded the startup motion to then close the window. The setting will be written to the robot when the window is closed. Now turn the power off then back on to see the robot move to his Home position. I then downloaded a front walk sequence from the web, uploaded it, and played it. Have a look at the video where I turn the robot on, and he moves automatically to the home position, then play the walk sequence. |
|
[Home] [The Build] [Unboxing] [Start Build] [Shoulder and Knees] [Feet and Hips] [Creating the Chest] [Control Unit/Servo Setup] [Attaching Servo Arms] [Attaching Servo Horns] [Final Assembly] [Finishing touches] [Trimming the Servos] [Home Position & Startup] [Early Days] [Contact] |
|
© 2009 Neil Hutchison |