|
|
|||||||||||||||||
|
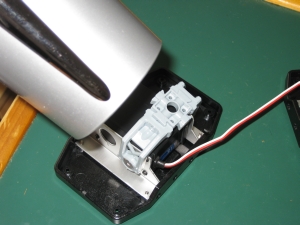
Even though you have set the neutral positions in the previous step for each servo, Id recommend that before and after you add each servo arm, you verify the neutral position for the servo, by reconnecting it to the RCB-3. Do this both before and after adding the screw to secure the arm. It may seem like overkill, but it will save a lot of time and headaches if you do this now. With that said, we can go ahead and attach the servo arms to the six servos which we created way back at the start of the build, which currently have no channel labels on them. These are the 4 Bracket B Long assemblies and the 2 Bracket Bs. |
 |
|
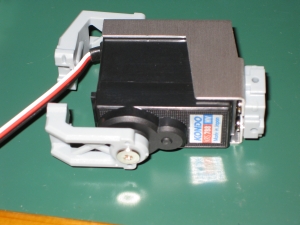
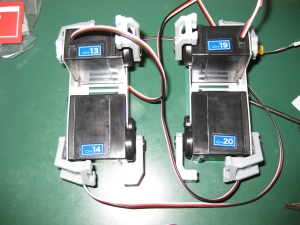
The picture above shows only the Bracket B however the B long is going to look identical other than the black extension piece on the right hand side. As the manual suggests, its unlikely that you will get the servo arm aligned perfectly on the servo. This isnt a huge problem as well correct any small deviance later during trimming, but the closer to the perfect alignment you can get the better. Rest the servo arm on the sprocket, then move it clockwise, or anti clockwise to see which position is closer to the perfect parallel alignment. When youre happy, push the servo arm fully onto the servo sprocket and screw it in. You will want to put a finger at the left side of the arm so that as you screw it in, the movement is minimal. Once youve screwed it in, reconnect it to the RCB-3 to check the neutral position. Once youve disconnected the servo, follow the diagrams in the manual to verify the range of movement of the servo arm as described. The servo arms will only move so far, so dont force them. I did find when doing this that some servos moved more smoothly by hand than others. Some were quite jerky and seemed stiff at points. The best thing to do is apply gentle and constant pressure to move the servo. Dont force it as youll damage it, but make sure the range of movement is as described. If not, go back to the neutral calibration and start again. After finishing all six, we add the servos to the knee assembly. Note that Ch13 and Ch19 do not have a 0 neutral position! |
 |
|
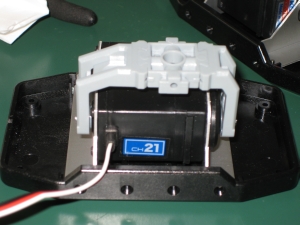
Again, verify the range of movement against the diagram in the manual. Also note that the servo arms on Ch 13 and Ch 19 will stop when they hit the servo case. This is due to the non 0 neutral position, but it is required so that the robot can move fully. Next up are the feet... |
 |
|
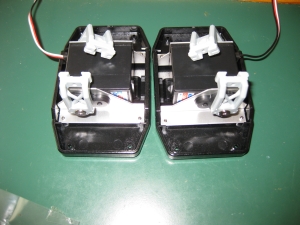
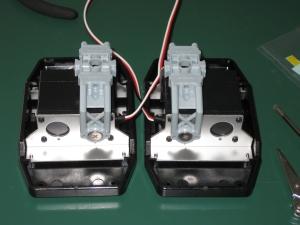
For the first time, were going to connect the two sides of the servo arms together using the Servo Arm 700a base parts. Connecting these together is one of the most difficult parts of building the robot. The parts have a VERY tight fit, and if youre like me, and your fingertips are not made of steel, youre going to have very sore fingers by the time youre finished putting all these together. The instructions suggest using a hair dryer to heat the arms. This does make a huge difference to how easily the parts will connect together, so I definitely advise doing so. Also, having a piece of cloth and some pliers to carefully squeeze the parts together helps. But be careful if you use pliers that you dont damage anything. Check that the parts area aligned correctly before attaching them together, and never use excessive force. You should be able to so this all by hand, but dont be surprised if it takes a little time (and some grunting!) |
 |
 |
||||
 |
|||||
|
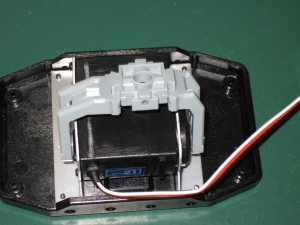
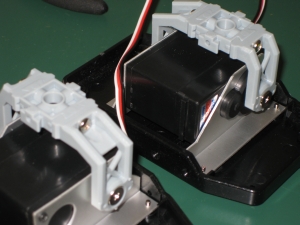
Two 2-6.8 self tapping screws are used to make sure these never come apart again (although I find it hard to believe with the force required to get them together that they ever would). Repeating the process on the other foot, and finally, the feet are ready. |
 |
 |
|
With that done, its time to move onto the Servo Horns which are a little more tricky since theyre circular and smooth. |
|
[Home] [The Build] [Unboxing] [Start Build] [Shoulder and Knees] [Feet and Hips] [Creating the Chest] [Control Unit/Servo Setup] [Attaching Servo Arms] [Attaching Servo Horns] [Final Assembly] [Finishing touches] [Trimming the Servos] [Home Position & Startup] [Early Days] [Contact] |
|
© 2009 Neil Hutchison |